When Your Dream Garage Floor Develops Unexpected Problems
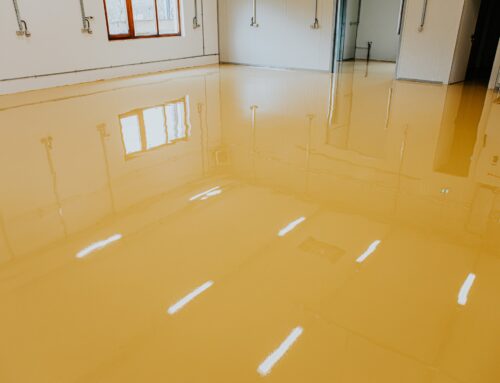
Maria stepped into her Knollwood garage three days after her epoxy installation, excited to finally park her car on the sleek new surface. Instead of the flawless finish she’d seen on day one, she noticed dozens of small blisters scattered across the center bay — some barely visible, others the size of quarters. In Granada Hills’ fluctuating spring temperatures, where mornings start cool and afternoons can hit 85 degrees, these bubbles are more common than most homeowners realize. The $8,000 she’d invested in upgrading her 800-square-foot garage suddenly felt uncertain. Understanding what causes these bubbles and how to address them can mean the difference between a minor fix and a complete redo.

📋 In This Guide
Why Bubbles Form in Southern California Epoxy Applications
Epoxy floor bubbles result from trapped air or gases rising through the coating before it cures. In Granada Hills, the primary culprit is concrete outgassing — a phenomenon where air trapped in the concrete’s porous structure expands when temperatures rise. When contractors apply epoxy during the cooler morning hours (a common practice to avoid working in afternoon heat), the concrete temperature might be 65 degrees. By noon, surface temperatures can reach 90 degrees or higher, causing trapped air to expand and push through the still-curing epoxy. This creates the distinctive bubble pattern homeowners discover a day or two after installation.
Moisture is the second major cause, particularly in older Granada Hills homes built before modern vapor barrier standards. Concrete slabs in neighborhoods like Old Granada Hills often lack proper moisture barriers. When groundwater vapor migrates upward through the slab, it encounters the epoxy coating and becomes trapped. Unlike air bubbles that appear during curing, moisture-related bubbles often develop weeks or months after installation, especially during our brief winter rainy season. A professional epoxy services in Granada Hills contractor should always perform moisture testing before application, but DIY installers frequently skip this critical step.
Application technique also plays a significant role. Rolling epoxy too aggressively introduces air into the coating itself. Using a roller with the wrong nap thickness, working in sections that are too large, or failing to back-roll properly all create opportunities for air entrapment. Temperature-related issues compound these problems — applying epoxy when the concrete is above 85 degrees or when humidity exceeds 60% significantly increases bubble risk. Granada Hills’ typical spring conditions, with 30-40% humidity and variable temperatures, create a narrow window for optimal application.
Identifying What Type of Bubble Problem You’re Facing
Before attempting repairs, you need to determine whether your bubbles are shallow surface imperfections or deeper coating failures. Pin a small bubble with a needle. If it deflates easily and you can feel the underlying concrete is solid, you’re dealing with a surface air pocket. These typically measure less than a quarter-inch in diameter and appear uniform in size. Surface bubbles are the easiest to repair and often respond well to DIY methods.
Larger bubbles — those exceeding half an inch in diameter or feeling soft when pressed — indicate more serious problems. If the bubble contains liquid when popped, you have a moisture issue that requires addressing the source before any repair will hold. Delamination bubbles feel hollow and may crackle when walked on. These suggest the epoxy has separated from the concrete entirely, often due to inadequate surface preparation or contamination. In Granada Hills homes built in the 1960s and 1970s, concrete surfaces may have old sealers or curing compounds that weren’t properly removed, preventing proper adhesion.
Check the pattern distribution. Random, scattered small bubbles across the floor suggest temperature-related outgassing. Bubbles concentrated in specific areas — near exterior walls, drain locations, or former planter bed areas — point to localized moisture problems. Bubbles appearing in perfect grid patterns often correspond to control joints or old crack repairs where the concrete composition differs. Document the pattern with photos from multiple angles before starting any repair work. This documentation proves valuable if you need to consult with a professional epoxy installer about the extent of the problem.
Repairing Minor Surface Bubbles Yourself
For scattered surface bubbles smaller than a dime, you can achieve acceptable results with careful DIY repair. Start by abrading each bubble with 80-grit sandpaper on a sanding block. Sand in circular motions until you’ve removed the bubble entirely and created a shallow depression with feathered edges. The surrounding epoxy should taper gradually into the repair area — harsh edges will show through your patch. Clean the sanded area thoroughly with denatured alcohol on a lint-free cloth, then allow it to dry completely. Granada Hills’ low humidity means surfaces dry quickly, but wait at least 30 minutes to ensure no solvent remains.
Mix a small batch of the same epoxy product used in your original installation. If you don’t know the brand, choose a high-quality 100% solids epoxy from a commercial supplier, not a big-box store kit. Temperature control is critical: work during the coolest part of the day (6-8 AM in Granada Hills) when concrete temperatures are stable. Apply the mixed epoxy to the abraded area using a small artist’s brush or plastic spreader, slightly overfilling the depression. The epoxy will self-level somewhat, but you want to ensure complete filling. After 10 minutes, use a clean foam brush to feather the edges, blending the repair into the surrounding surface.
Allow the repair to cure for the manufacturer’s recommended time — typically 24 hours for foot traffic and 72 hours for vehicle traffic. The patch will likely show a slight color variation initially, but most epoxies blend better as they fully cure and oxidize. For patches in high-visibility areas, consider applying a thin topcoat of clear polyurethane or polyaspartic over the entire floor section once the repair has cured. This creates uniform gloss and helps disguise minor color differences. Homeowners in Granada Hills North who’ve used this technique report that repairs become nearly invisible within 2-3 months as the coatings age together.
Addressing Moisture Problems and Larger Failures
When bubbles exceed one inch in diameter, appear soft, or show evidence of moisture underneath, you’re facing a problem that requires more aggressive intervention. Use a utility knife to cut around the affected area, creating a clean perimeter. Remove all loose or delaminated epoxy — if the coating pulls up easily, continue cutting until you reach firmly bonded material. This often reveals a larger problem area than the visible bubble suggested. In some Granada Hills garages, especially those built into hillsides in areas near O’Melveny Park, hydrostatic pressure from upslope drainage creates persistent moisture issues that no surface repair can address.
Test the concrete moisture level using a calcium chloride test kit (available at flooring suppliers) or a concrete moisture meter. Readings above 3 pounds per 1,000 square feet per 24 hours indicate excessive moisture that will prevent epoxy adhesion. If moisture is the problem, you have two options: address the source (improve exterior drainage, install a vapor barrier system, or apply a moisture-mitigating primer) or accept that epoxy isn’t suitable for this location. Many professional epoxy contractors serving the area can install specialized moisture-barrier systems, but these add $3-5 per square foot to project costs — a significant expense for a 400-square-foot garage.
For large areas without moisture issues, the repair process involves grinding the concrete back to bare substrate, re-profiling the surface to create proper adhesion, and essentially re-coating that section. Rent a concrete grinder with vacuum attachment (expect $100-150 per day in the Granada Hills area) and remove all epoxy from the affected zone plus 6 inches beyond any visible problems. Profile the concrete to ICRI CSP 2-3 using diamond grinding or scarification. Clean thoroughly, apply a bonding primer if recommended by your epoxy manufacturer, then re-coat following the original installation process. This level of repair requires significant skill and equipment — most homeowners find that hiring professionals produces better results for less total cost when factoring in tool rental and material waste.
Prevention Strategies for Future Applications
Whether you’re planning a new epoxy installation or protecting a successful repair, understanding prevention eliminates most bubble problems. Schedule application during Granada Hills’ optimal weather windows: late fall through early spring, when overnight temperatures stay above 55 degrees but daytime highs remain below 80. Avoid application during Santa Ana wind conditions, which dramatically increase concrete surface temperature while dropping humidity to single digits — a perfect recipe for rapid outgassing.
Insist on proper concrete preparation regardless of who performs the work. The surface must be mechanically profiled to remove all contaminants and create proper texture for adhesion. Shot blasting or diamond grinding are the gold standards; acid etching alone rarely suffices, especially on harder aggregate concrete common in Granada Hills construction. Perform moisture testing even if the slab appears dry — visible dampness represents obvious problems, but vapor transmission occurs in apparently dry concrete. For homes in Granada Hills South near the wash areas, moisture testing should be non-negotiable given the higher water table in those locations.
Control application conditions carefully. Allow concrete to acclimate to air temperature for at least 12 hours before coating. In a closed garage, this means opening doors the evening before to equalize temperatures. Monitor concrete surface temperature continuously during application — infrared thermometers cost under $30 and provide instant readings. If the surface exceeds 80 degrees or is more than 10 degrees warmer than air temperature, delay application. Mix epoxy in small batches that can be applied within the working time. Use proper roller technique: slow, deliberate passes with adequate back-rolling to release trapped air. Many experienced installers use spiked shoes and back-roll with a foam roller within minutes of application to release rising bubbles before the epoxy begins to gel.
When Professional Help Makes Financial Sense
Determining whether to tackle repairs yourself or call professionals depends on the extent of damage and the value of your time and risk tolerance. For a handful of small bubbles on a garage floor worth $800-900,000 — typical in neighborhoods like Knollwood — spending $200-400 on professional spot repair protects your investment far better than a potentially flawed DIY attempt. Professionals bring specialized tools, matched materials, and warranty coverage. Five Star Epoxy & Coatings offers comprehensive repair assessments at (818) 355-3804, and can often diagnose whether bubbles represent isolated problems or symptoms of larger coating failure.
Consider professional intervention when bubbles cover more than 10% of the floor area, when moisture testing reveals elevated readings, or when previous repair attempts have failed. A complete epoxy floor system installed by qualified contractors includes moisture barriers, proper primers, and topcoats that DIY applications typically omit. While professional installation costs $7-12 per square foot in Granada Hills compared to $2-4 for materials-only DIY, the longevity difference is dramatic. Professional installations routinely last 15-20 years, while DIY applications often show problems within 3-5 years, especially under vehicle traffic.
For extensive problems requiring removal and re-coating, professionals deliver value through efficiency and access to commercial-grade materials unavailable to homeowners. They also carry liability insurance protecting you if installation damages your concrete or creates safety hazards. When budgeting for professional work, get itemized quotes covering surface preparation, moisture mitigation (if needed), primer application, base coat, decorative elements, and topcoat. Granada Hills contractors typically offer better pricing during slower winter months. Ask about warranty specifics — reputable installers provide 5-10 year guarantees covering delamination, peeling, and premature wear when proper maintenance is followed.
Bubbles in epoxy floors frustrate homeowners, but they’re usually repairable when caught early and addressed correctly. Small surface bubbles respond well to careful DIY repair, while larger problems or moisture issues require professional diagnosis and intervention. Understanding the causes — temperature fluctuations, moisture, and application errors — helps you prevent problems in future projects or make informed decisions about repair versus replacement. Whether you choose to tackle repairs yourself or bring in experienced professionals, addressing bubbles promptly prevents them from expanding and causing more extensive coating failure. For complex situations or when you want guaranteed results, Five Star Epoxy & Coatings serves Granada Hills homeowners with comprehensive repair and installation services. Call (818) 355-3804 to schedule an assessment and protect your flooring investment.
❓ Frequently Asked Questions
Why do bubbles appear in epoxy floors days after installation in Granada Hills?
Bubbles typically result from concrete outgassing caused by temperature fluctuations. When epoxy is applied during cool Granada Hills mornings and concrete temperatures rise 20-30 degrees by afternoon, trapped air expands and pushes through the curing coating. Moisture vapor from slabs without proper barriers also creates delayed bubbling, especially in older homes.
Can I repair small epoxy floor bubbles myself or should I hire a contractor?
Small surface bubbles under a quarter-inch diameter can be successfully repaired by homeowners using careful sanding, cleaning, and patching techniques. However, bubbles larger than half an inch, those containing moisture, or widespread problems covering more than 10% of the floor should be evaluated by professionals like Five Star Epoxy & Coatings at (818) 355-3804 to ensure proper repair and prevent recurrence.
How much does professional epoxy floor bubble repair cost in Granada Hills?
Professional spot repair for minor bubble issues typically ranges from $200-400 for small areas, while extensive repairs requiring section removal and re-coating run $5-8 per square foot. Complete floor re-coating costs $7-12 per square foot in Granada Hills. The cost depends on damage extent, whether moisture mitigation is needed, and the specific products required to match existing coatings.
What's the best time of year to prevent bubbles when installing epoxy floors?
Late fall through early spring offers optimal conditions in Granada Hills, with stable temperatures between 60-75 degrees and moderate humidity. Avoid summer installations when concrete surface temperatures exceed 85 degrees, and never apply during Santa Ana wind conditions. Schedule work for early morning hours when temperatures are most stable throughout the curing period.