The Sunday Morning Discovery That Changed Everything
You walk into your Carlton Terrace garage Sunday morning to grab your cycling gear, coffee still in hand, and freeze mid-step. Your month-old epoxy floor coating — the one that looked flawless under LED lights during curing — now shows dozens of small blisters across the section where morning sun streams through the side window. Some bubbles have already popped, leaving tiny craters that catch the light. Your $3,500 investment suddenly looks like a DIY disaster. This scenario plays out in epoxy flooring services in Woodland Hills more often than most homeowners realize, particularly during temperature swings between cool nights and warm Southern California days.
📋 In This Guide
Understanding how to fix bubbles in epoxy floor coating requires identifying what caused them, assessing the damage severity, and choosing the right repair approach. Most bubble problems fall into repairable categories when addressed promptly, though the fix-it-yourself versus call-a-professional decision depends entirely on the extent and root cause of the failure.
Step 1: Identify the Bubble Type and Underlying Cause
Before touching sandpaper to your floor, you need to determine what created the bubbles. The most common culprit is outgassing, which allows air or gas from the concrete substrate to escape and cause blisters, craters, bubbles, or pinholes. Walk your entire floor with good lighting and examine the bubble patterns closely.
Outgassing typically shows up as a perfect circle with either a ridge around the edge or as a bubble in the coating, with a possible pinhole visible at the bottom where gas is escaping from the slab. If you see uniform circular bubbles concentrated in one area, that section of concrete likely has higher porosity or residual moisture. Random scattered bubbles throughout the surface often indicate application temperature problems or humidity issues during curing.
In Woodland Hills’ climate, temperature-related bubbles are particularly common. Extreme heat accelerates chemical reactions inside the epoxy, and if the coating cures too quickly, it can trap air bubbles or fail to level properly. Our summer temperatures routinely reach the mid-80s, and garage floor temperatures can exceed 100°F when exposed to direct afternoon sun — well above the ideal 65-85°F application range.
Check for these diagnostic clues: bubbles only in sun-exposed sections suggest heat acceleration; bubbles appearing days or weeks after installation point to moisture migration; uniform distribution across the entire floor indicates mixing problems or contamination. Understanding the cause determines your repair strategy.
Step 2: Assess Damage Severity and Repair Scope
Count your bubbles and measure the affected area. This assessment determines whether you’re facing a quick touch-up or a major repair project. Fewer than 20 scattered bubbles across a two-car garage? That’s a manageable DIY repair. Hundreds of bubbles across 30% or more of the floor? You’re looking at professional intervention.
Examine individual bubbles carefully. Use a utility knife to gently probe one bubble — remove any skin from the top and see if there is a small hole at the bottom of the crater, which is a sign that something is blowing through the hole. If you find pinholes at the base of multiple bubbles, you have active outgassing that will continue unless properly sealed.
Create a repair map by marking bubble locations with painter’s tape or chalk. Photograph the damage from multiple angles for reference if you decide to contact a professional epoxy floor contractor. This documentation also helps if the problem was caused by installer error covered under warranty.
For Woodland Hills homeowners, consider timing factors: if bubbles appeared within 72 hours of installation during a heat wave, temperature was likely the culprit. If bubbles emerged weeks later following unusual rainfall, moisture migration through the slab is the probable cause. Warner Center and Vista de Oro homes built in the 1970s-80s sometimes have concrete slabs with higher porosity that makes outgassing more common.
When DIY Repair Makes Sense
Tackle the repair yourself if you have: fewer than 25 small bubbles (under 1/4 inch diameter), no active moisture issues, bubbles concentrated in one manageable section, and the original epoxy product still available for color matching. You’ll need basic tools including an orbital sander, 120-220 grit sandpaper, vacuum, acetone, and leftover coating material.
When to Call Five Star Epoxy & Coatings
Professional repair becomes necessary when: bubbles cover more than 20% of the floor, you discover pinholes indicating active gas release, the entire coating shows poor adhesion or delamination, or moisture testing reveals ongoing vapor transmission. Large-scale failures require professional grinding equipment, moisture mitigation systems, and complete recoating — not weekend DIY fixes.
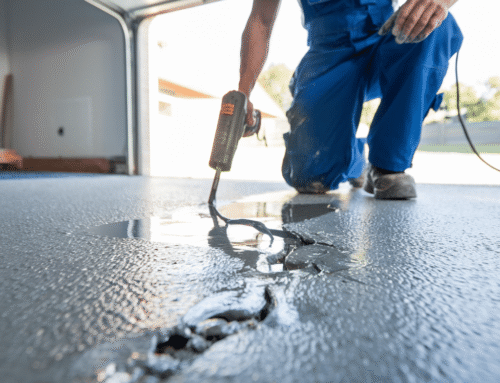
Step 3: Prepare the Damaged Surface for Repair
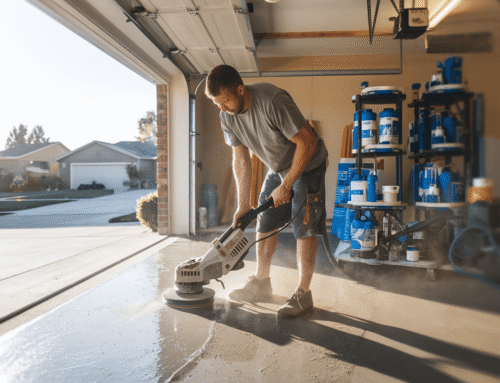
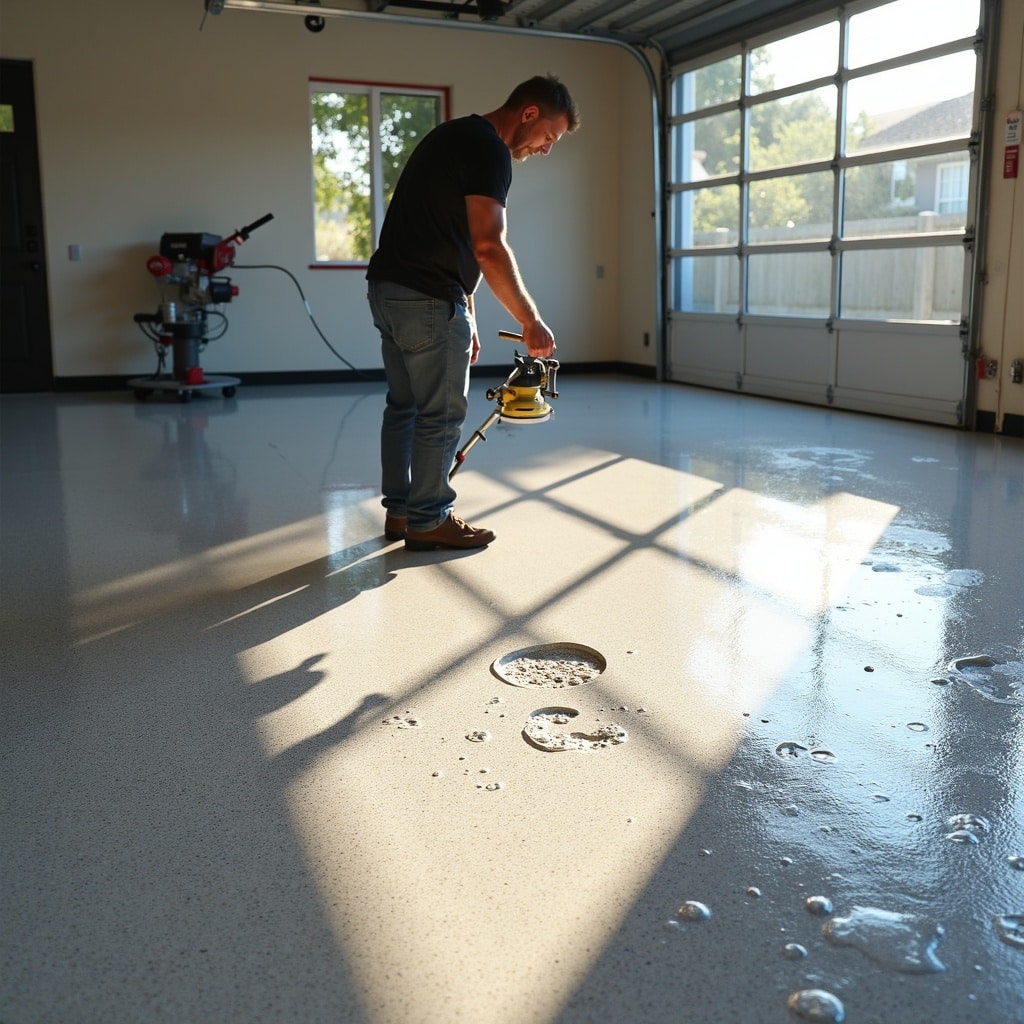
Once you’ve decided to proceed with repair, surface preparation determines success or failure. Use a handheld orbital sander equipped with fine-grit sandpaper (around 120 to 220 grit) to gently sand the bubbled areas and remove the surface layer which has formed bubbles. For scattered individual bubbles, spot sanding works well. Work in circular motions, feathering the edges of each repair area to create a gradual transition.
For floors with numerous bubbles, use a rotary scrubber and pad with a 60-grit screen to quickly go over the floor, shaving off any bubble tops and flattening the surface, then sweep up the screening dust. This approach works when you have dozens of small bubbles rather than just a few isolated spots.
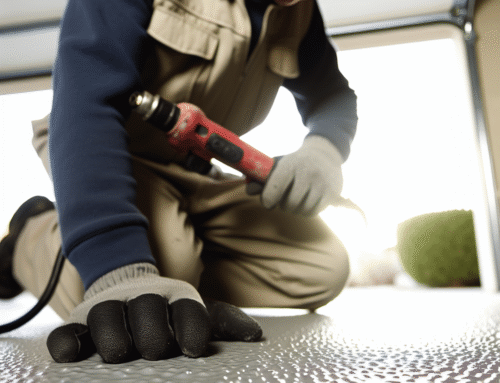
Critical step: if you found pinholes during your assessment, those holes must be filled before recoating. Use glazing compound to fill each hole before your next coat — you and a helper can fill a 1,200 sq. ft. floor in about an hour. This prevents gases from continuing to push through the new epoxy layer.
Thoroughly vacuum the floor to pick up any dust or debris, then wipe the floor with a damp cloth or wet mop to ensure it’s completely cleared of any dust or particulate matter. For solvent-compatible systems, wipe sanded areas with acetone and allow 30 minutes for complete evaporation before applying new epoxy. Any remaining dust or solvent will compromise the repair bond.
Woodland Hills’ low humidity (typically 50-67% during summer months) actually works in your favor here — dust settles quickly and surfaces dry faster than in coastal areas. Plan your prep work for early morning when garage temperatures are coolest, ideally between 65-75°F.
Step 4: Apply Repair Coating Using Proper Technique
Mixing and application technique matter enormously for bubble-free repairs. When applying a new coat of epoxy, mix the resin and hardener ensuring the manufacturer’s instructions are properly followed — the correct ratios and mixing technique will prevent new bubbles from forming. Mix slowly using a paddle mixer at low speed; vigorous mixing whips air into the epoxy.
For spot repairs on individual bubbles, apply repair coating with a small foam brush or syringe for precision. The area could be carefully sanded and a syringe with the clear topcoat could place the perfect dot to fix and seal the pinhole in the coating. This method works beautifully for 5-20 isolated bubble repairs where you want invisible fixes.
For larger repair sections, prepare and spread the epoxy over the properly prepared area using an epoxy flooring squeegee or roller. Work in thin, even layers — thick applications trap more air. Back-roll immediately after spreading to release any bubbles introduced during application.
Timing is critical in Woodland Hills’ climate. Epoxy coatings perform best when air and surface temperatures stay between 65°F and 85°F, with humidity below 60%. Apply repairs in early morning (6-9 AM) or evening (6-8 PM) when garage temperatures are moderate. Avoid mid-day applications when sun-heated concrete can reach 100°F+, accelerating cure and trapping bubbles.
After application, protect the repair area from temperature extremes, direct sunlight, and foot traffic for 24-48 hours minimum. Place cardboard shields to block afternoon sun if your garage has west-facing exposure common in Warner Center developments.
| Repair Method | Best For | Time Required | Difficulty |
|---|---|---|---|
| Syringe spot repair | 5-20 isolated bubbles under 1/4″ | 1-2 hours | Easy |
| Orbital sander + patch coating | 20-50 bubbles in concentrated area | 3-5 hours | Moderate |
| Floor screening + full recoat | 100+ scattered bubbles | 6-8 hours (plus cure) | Advanced DIY |
| Professional grind & recoat | Widespread failure, moisture issues | 1-2 days | Professional only |
Step 5: Prevent Future Bubble Formation
Successful repair means nothing if bubbles return in six months. Prevention strategies target the specific causes identified in Step 1. For heat-related bubbles, control application timing and temperature. Technicians use specialized, heat-resistant resins and work early in the morning or late in the evening to maintain the perfect curing window, and also monitor slab temperatures to ensure coatings cure evenly.
The recommended humidity range for epoxy installation is typically between 40% to 60%, which provides a suitable environment for proper epoxy curing and helps avoid issues like bubbling or surface imperfections caused by excess moisture. In Woodland Hills, our relatively dry climate usually stays within this range, but monitor conditions before any coating work.
For outgassing prevention on porous concrete, proper surface preparation makes all the difference. Dense concrete requires acid etching; porous slabs need grinding to open the surface, followed by a penetrating primer coat that seals subsurface air pockets. This is where Five Star Epoxy & Coatings expertise becomes invaluable — professionals know how to read concrete porosity and select appropriate primers.
Temperature management extends beyond application timing. During the 24-72 hour cure period, maintain stable temperatures. Close garage doors during cool nights to prevent rapid temperature drops. Block direct sunlight during hot afternoons. Consistent temperatures between 65-80°F throughout curing prevent thermal expansion that can create new bubbles.
If your initial bubble problem stemmed from moisture, address the root cause before any repair. Check for: plumbing leaks beneath the slab, poor drainage around the foundation directing water under concrete, or high water table issues common in some Granada Hills and Warner Center locations near seasonal creek beds. Moisture vapor transmission testing (using plastic sheet tests or calcium chloride kits) reveals whether your slab is suitable for epoxy coating or needs vapor barrier primers first.
Professional Solutions for Complex Bubble Problems
Some bubble scenarios exceed DIY repair capabilities and require professional intervention with specialized equipment. If finish coats are applied before the outgassing issue is identified, the best option is to sand the affected areas and patch with topcoat material — or a thixotropic product, followed by topcoat material. Thixotropic patching compounds require proper mixing ratios and application techniques that professionals handle daily.
Widespread bubble failures often indicate systemic problems: inadequate surface preparation, contaminated concrete, active moisture vapor transmission, or product incompatibility. These situations demand complete coating removal and starting fresh. Professional epoxy floor bubble repair services use diamond grinders to remove failed coatings down to bare concrete, moisture meters to test slab conditions, and industrial dehumidifiers to dry substrates when needed.
The cost difference between DIY spot repairs and professional complete recoating is significant. Based on current market rates, expect DIY repairs to cost $50-150 in materials for small-scale fixes. Professional repairs for moderate bubble problems (screening and recoating 20-30% of floor area) typically run $800-1,500 for a standard two-car garage. Complete coating removal and reapplication ranges from $2,500-4,500 depending on floor size and system selected — essentially the same as starting over.
When hiring repair contractors, ask specific questions: Do they moisture-test before coating? What primer systems do they use for porous concrete? How do they control temperature during application and cure? Will they guarantee against future bubbling? Our process addresses these factors systematically because we’ve seen every bubble scenario in Woodland Hills’ unique climate conditions.
For homeowners in Northridge and surrounding areas facing bubble problems, professional assessment often saves money long-term. We can determine within minutes whether simple spot repairs will hold or whether underlying moisture, concrete quality, or application errors require complete system removal. That diagnostic expertise prevents homeowners from throwing good money after bad on repairs that fail within months.
Ready to Fix Your Bubbled Epoxy Floor Correctly?
Bubble problems in epoxy floor coatings are frustrating but usually repairable when addressed with the right approach for your specific situation. Small-scale spot repairs work beautifully for isolated bubbles without underlying substrate issues. Larger bubble populations or moisture-related problems demand professional intervention to prevent recurring failures.
Five Star Epoxy & Coatings has repaired hundreds of bubbled epoxy floors throughout Woodland Hills, from minor touch-ups to complete system replacements. We provide honest assessments of whether your floor needs spot repairs or full recoating, backed by moisture testing and surface evaluation. Our installation techniques prevent bubble formation through proper surface preparation, climate-appropriate application timing, and premium coating systems designed for Southern California conditions.
Don’t let bubbled epoxy turn your garage into an eyesore or compromise your floor’s protective qualities. Call us at (818) 355-3804 for a professional assessment. We’ll diagnose the cause, explain your repair options clearly, and provide upfront pricing with no surprises. Most repairs can be scheduled within one week, with work completed in 1-2 days depending on scope. Your garage deserves a flawless finish that lasts years, not months — let’s make that happen together.
❓ Frequently Asked Questions
How much does it cost to repair bubbles in an epoxy garage floor?
DIY spot repairs for minor bubble issues typically cost $50-150 in materials. Professional repairs for moderate problems (affecting 20-30% of the floor) range from $800-1,500 for a two-car garage, while complete coating removal and reapplication costs $2,500-4,500 depending on floor size and system selected.
Can I fix small epoxy floor bubbles myself or should I hire a contractor?
You can successfully repair fewer than 25 small bubbles (under 1/4 inch) yourself using an orbital sander and matching coating material. However, if bubbles cover more than 20% of your floor, show pinholes indicating active gas release, or you discover moisture issues, professional repair from contractors like Five Star Epoxy & Coatings at (818) 355-3804 is necessary.
What causes bubbles to form in epoxy floor coating after installation?
Bubbles typically form from outgassing (trapped air escaping from porous concrete), temperature extremes during application or curing, high humidity during installation, or moisture vapor transmission through the slab. In Woodland Hills, heat-related bubbling is common when garage temperatures exceed 100°F during summer afternoons.
How long do epoxy floor bubble repairs last before needing redoing?
Properly executed repairs that address the underlying cause (moisture, temperature, or substrate porosity) should last as long as the original coating — typically 5-10 years. However, repairs that only fix surface bubbles without solving root problems may fail again within 6-12 months, requiring professional intervention to correct the fundamental issue.
📖 More Tips for Woodland Hills
-
 Fixing Yellowing Clear Epoxy Coating: Woodland Hills FAQ
Discover why clear epoxy floor coatings yellow in Woodland Hills showrooms and learn proven assessment, repair, and prevention…
-
What Causes Bubbles in Your Garage Epoxy Floor? A Woodland Hills Repair Guide
Discover why bubbles form in epoxy floor coatings and how to fix them. This Woodland Hills homeowner's guide…
-
How Much Does Metallic Epoxy Flooring Actually Cost in 2025? A Woodland Hills Budget Breakdown
Woodland Hills homeowners are pricing metallic epoxy right now as property values climb and renovation budgets loosen. This…
-
Timing Your Woodland Hills Garage Floor Epoxy Installation: What Summer Heat Does to Application Chemistry
Valley floor heat in Woodland Hills compresses epoxy installation windows to three critical morning hours. Understanding how sustained…