Spot Repair or Complete Removal? Understanding Your Options
When moisture blisters appear across your garage floor epoxy, especially in basements and ground-level slabs, the first question homeowners ask is whether they can simply patch the problem areas or need to start from scratch. In Woodland Hills, where our hardwater conditions and specific soil composition create unique moisture challenges, this decision framework becomes critical. A spot repair typically costs $1.50 to $3.00 per square foot for moisture mitigation and reapplication, while full removal and reinstallation can reach $3 to $12 per square foot installed in 2026, with a standard two-car garage running $1,500 to $5,000 depending on the system complexity. The determining factor isn’t just cost—it’s whether your concrete’s moisture levels exceed what repair methods can address.
📋 In This Guide
This journey from discovering those first telltale bubbles to a permanently restored garage floor requires understanding what’s happening beneath your epoxy, testing your concrete properly, and choosing the repair path that matches your specific moisture conditions. For Woodland Hills homeowners dealing with hard water containing elevated levels of minerals like calcium and magnesium, the stakes are higher because these minerals can contribute to long-term moisture vapor issues if not addressed correctly.
The Science Behind Blistering: Why Moisture Wins Every Time
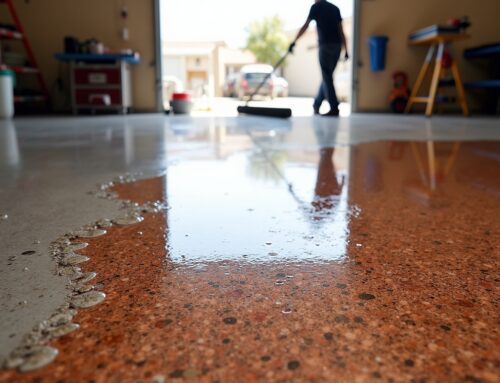
Moisture blisters don’t appear randomly. They form when water vapor migrates through the concrete slab surface and becomes trapped beneath the impermeable epoxy coating. Picture your concrete as a massive sponge that’s constantly breathing—moisture moves upward through millions of microscopic pores, driven by temperature differentials and vapor pressure. When that vapor hits your epoxy layer, it can’t escape, so it accumulates at the bond line until the coating delaminates and forms those characteristic dome-shaped blisters.
In Woodland Hills’s established neighborhoods like Warner Center and Carlton Terrace, many homes were built decades ago when vapor barriers weren’t standard practice beneath concrete slabs. Without that protective membrane between the soil and your garage floor, groundwater vapor has a direct pathway upward. The problem intensifies during our warmer months when temperatures between 60°F to 85°F and humidity levels approach 85% create ideal conditions for accelerated moisture transmission. Epoxy flooring rarely fails because the product is weak—it fails because the system was improperly specified, poorly installed, or inadequately prepared, and moisture is the leading culprit.
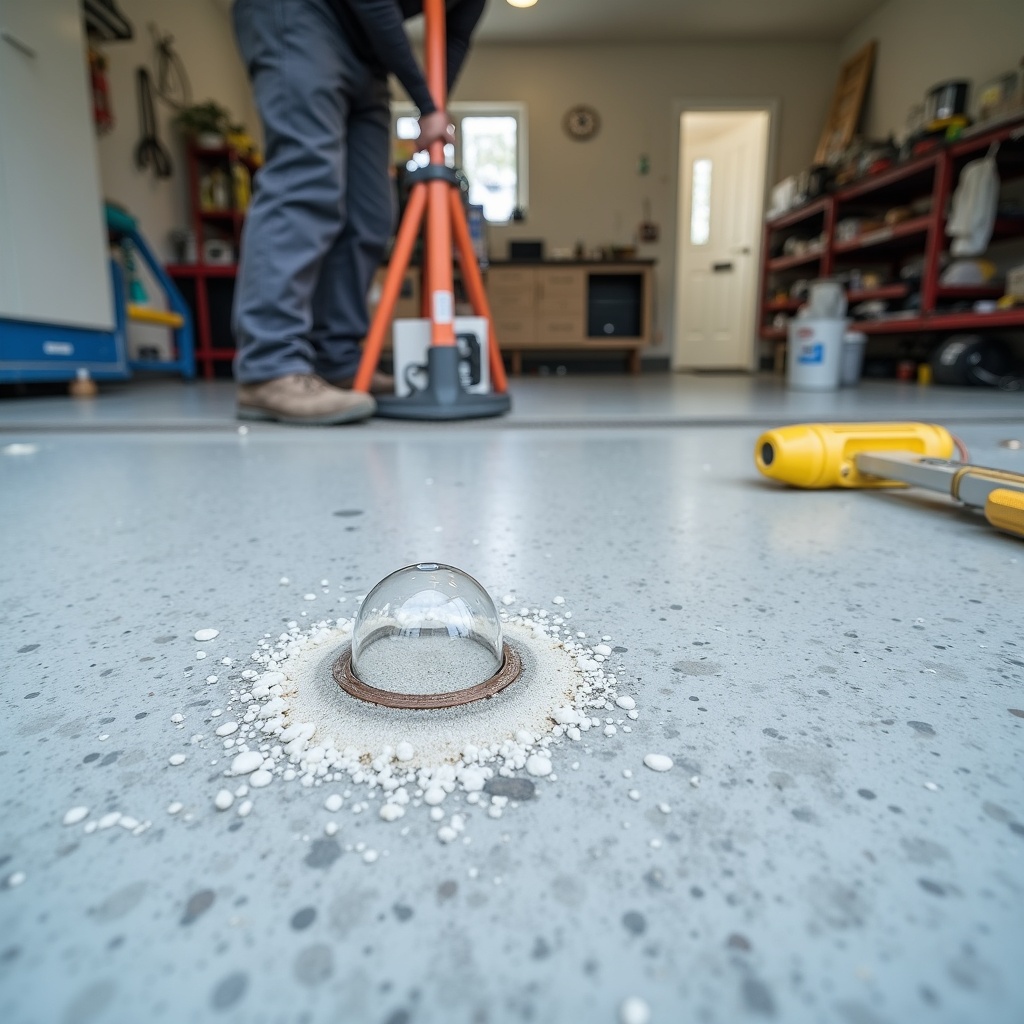
Understanding Moisture Vapor Emission Rates
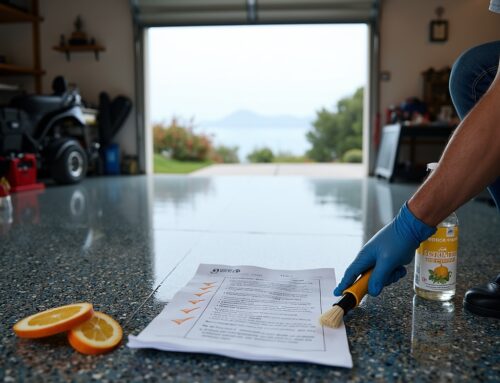
Professional moisture assessment uses two primary testing methods. The calcium chloride test method determines the moisture vapor emission rate (MVER) by sealing a small dish of calcium chloride on clean concrete under a plastic dome, with the salt absorbing moisture over three days to calculate the MVER. Results are expressed in pounds per 1,000 square feet of concrete per 24 hours, with tests costing about $10 per shot. Most epoxy manufacturers specify maximum acceptable levels of 3.0 lbs or less per 1,000 square feet per 24 hours for standard installations.
When Testing Reveals the Problem Scope
If a calcium chloride test shows moisture vapor transmission above 3 lbs per 1,000 sq ft per 24 hours, a moisture mitigation primer is required, adding $1.50 to $3.00 per square foot—and skipping this step on a high-moisture slab is the leading cause of epoxy delamination. For Woodland Hills garages, testing should occur at multiple locations because moisture levels can vary significantly across a single slab, particularly near exterior walls or areas where drainage issues exist.
💰 Typical Moisture Blister Repair Costs
- Calcium Chloride Testing (3 locations): $30–$50
- Blister Removal & Surface Prep: $1–$3 per sq ft
- Vapor Barrier Primer Application: $1.50–$3 per sq ft
- Epoxy Reapplication (spot repair): $3–$5 per sq ft
- Full System Replacement (500 sq ft garage): $1,500–$6,000
Diagnosing Your Specific Blister Pattern
Not all blisters indicate the same severity of moisture problems. Small, isolated bubbles less than one inch in diameter scattered randomly across your floor often indicate minor surface moisture that was present during installation—perhaps from inadequate drying time after cleaning or unexpected humidity spikes. These typically respond well to spot repairs. Larger blisters concentrated in specific areas, particularly near perimeter walls or floor drains, suggest localized moisture sources that may require addressing the underlying water intrusion before any epoxy repair will hold.
The most concerning pattern is widespread blistering across 40% or more of your garage floor surface, with blisters ranging from two to six inches in diameter. This pattern indicates systemic moisture vapor transmission through the entire slab and typically means your concrete’s MVER exceeds safe limits for standard epoxy. In these cases, spot repairs become an expensive cycle of failure because you’re not addressing the root cause. Before calling a epoxy flooring services in Woodland Hills contractor, document your blister patterns with photos and measurements—this information helps professionals assess whether repair or replacement makes economic sense.
The Peel Test: Assessing Bond Failure Extent
Select a representative blister and carefully cut an X-pattern through the epoxy with a utility knife. Grasp one of the triangular flaps and pull steadily. If the epoxy releases cleanly from the concrete with minimal resistance, leaving the concrete surface relatively clean, you’re seeing classic moisture-induced delamination. If chunks of concrete surface come up with the epoxy, you may have deeper substrate issues including compromised concrete where the epoxy bonded to a weak surface, and when the concrete fails, the epoxy fails with it. The latter scenario often requires more extensive concrete repair before any coating can succeed.
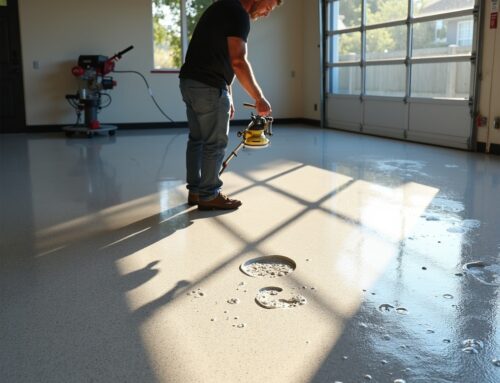
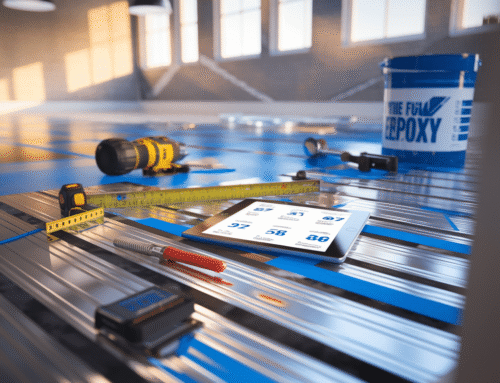
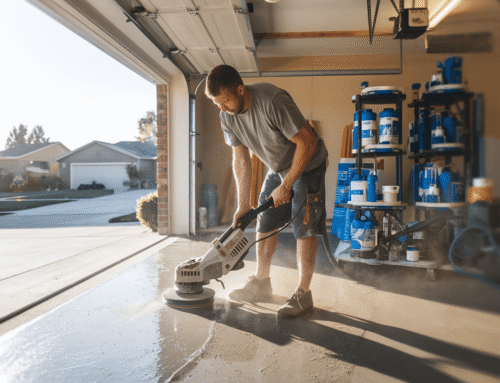
Executing Proper Blister Removal and Surface Preparation
Successfully repairing moisture blisters requires removing not just the visible bubbles but all compromised coating in the affected zones. Use a floor scraper or power stripper to remove epoxy in a radius extending at least 6 inches beyond each blister’s perimeter—the coating that looks intact near blisters is often partially delaminated and will fail shortly after your repair. Grinding off old coatings adds $1.00 to $3.00 per square foot depending on the thickness and adhesion of the old material.
After removal, the exposed concrete must be mechanically profiled to achieve proper surface texture. Grinding or shot blasting creates the required surface profile for adhesion, with professional specifications calling for a CSP#3 profile that feels like 60-grit sandpaper. This step is non-negotiable for moisture repairs because skipping proper preparation is one of the most common causes of coating failure. Many Woodland Hills homeowners attempt to acid-etch as a shortcut, but this method doesn’t create sufficient mechanical profile for vapor barrier primers and actually can introduce additional moisture into the concrete.
Drying Time: The Invisible Success Factor
After grinding, your concrete needs adequate drying time before primer application. In Woodland Hills’s climate, minimum drying periods range from 24 to 72 hours depending on ambient humidity and the depth of grinding. Use fans to promote air circulation but avoid direct sunlight through garage door openings, which creates uneven surface temperatures that affect primer curing. Professional installers verify dryness by taping a 2-foot square of plastic sheeting to the prepared area overnight—if condensation appears on the plastic’s underside by morning, the concrete hasn’t dried sufficiently.
Applying Vapor Barrier Primers: Your Moisture Defense System
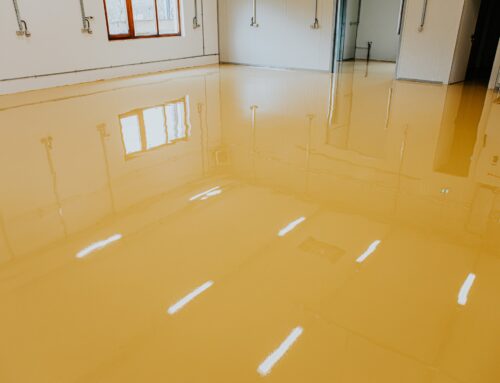
Moisture Vapor Barrier Epoxy is a two component 100% solids epoxy seal coat that can help control moisture vapor emission rates up to 20 lb/24hr/1000 ft², alleviating some issues associated with moisture vapor in concrete, and in most situations one coat applied at 94 sq ft per gallon will do the job. These specialized primers work differently than standard epoxy—they’re formulated with specific resin chemistry that creates an impermeable membrane while maintaining adhesion despite the presence of moisture vapor.
Application technique matters enormously. Pour the mixed vapor barrier primer in ribbon patterns across the prepared area, then spread using a notched squeegee or roller to achieve the manufacturer’s specified thickness—typically 16 mils wet film thickness. Work quickly but methodically because vapor barrier primers offer a fast 4-6 hour dry time, which means limited working time before the material begins to gel. Back-rolling ensures complete coverage without holidays (missed spots) that create pathways for moisture breakthrough.
| Repair Approach | Best For | Moisture Limit | Expected Longevity |
|---|---|---|---|
| Spot Repair (Standard Epoxy) | Isolated blisters, MVER under 3 lbs | Up to 3 lbs/1000 sq ft/24hr | 5–10 years |
| Vapor Barrier Primer + Topcoat | Moderate moisture, MVER 3–12 lbs | Up to 20 lbs/1000 sq ft/24hr | 10–15 years |
| Full Removal + High-Build System | Widespread blisters, high MVER | Up to 25 lbs/1000 sq ft/24hr | 15–20 years |
| Moisture Remediation (Exterior) | Extreme MVER, water intrusion | Above 25 lbs requires drainage solutions first | Varies by source resolution |
Topcoat Compatibility and Timing
After vapor barrier primer curing, you face a critical recoat window. Most moisture barrier systems require topcoating within 12 to 48 hours to ensure proper intercoat adhesion without additional surface preparation. If you exceed this window, the cured primer surface becomes too smooth for mechanical bonding, necessitating light sanding before applying your decorative epoxy layer. Select topcoat products specifically formulated for application over non-porous surfaces—standard garage floor epoxy won’t bond reliably to vapor barrier primers without proper specification matching.
Prevention Strategies for Woodland Hills Soil Conditions
Woodland Hills sits in the San Fernando Valley where soil composition and drainage patterns create specific moisture challenges. Our area’s clay-heavy soils retain water much longer than sandy compositions, meaning seasonal rainfall creates extended periods of elevated groundwater levels. Properties in lower-elevation areas near Topanga Canyon or along natural drainage paths face higher baseline moisture vapor transmission than hillside locations.
Before installing any new garage floor epoxy during summer months, address exterior drainage issues that contribute to moisture problems. Ensure downspouts discharge at least 6 feet from your garage foundation, regrade soil slopes away from the structure at a minimum 2% grade, and verify that perimeter drains remain functional and unclogged. For properties on slopes in Vista de Oro or South of Ventura neighborhoods, retaining wall drainage becomes critical—blocked weep holes can redirect water pressure directly beneath your garage slab.
Interior prevention starts with understanding your specific moisture baseline. You might need a garage floor moisture barrier test ($200 to $400) if moisture issues are suspected, with this calcium chloride test determining if additional waterproofing is required before epoxy application. Testing should occur during late winter or early spring when groundwater levels typically peak in our region, providing worst-case moisture readings that inform your coating system selection. If testing reveals MVER above 12 lbs, consider delaying installation until you can implement proper vapor barrier systems rather than accepting a coating that will likely fail within 2–3 years.
When to Call Professional Help in Woodland Hills
While DIY moisture blister repair tempts budget-conscious homeowners, the technical requirements for successful moisture remediation typically exceed casual DIY capabilities. Professional Five Star Epoxy & Coatings installers bring calibrated moisture testing equipment, proper grinding and profiling tools, and experience matching repair systems to specific moisture conditions—expertise that prevents the costly cycle of repeated failures.
The decision point comes down to repair complexity and moisture severity. If your testing shows MVER below 5 lbs and blisters cover less than 20% of your floor area, a knowledgeable DIYer with proper equipment might execute successful spot repairs. Once MVER exceeds 8 lbs or blistering approaches 40% coverage, professional intervention becomes the economically rational choice. Aging slabs and stricter testing standards mean more projects require mitigation, often adding $2 to $4 per square foot but significantly reducing failure risk—an investment that pays off in coating longevity.
For Woodland Hills homeowners weighing their options, Five Star Epoxy & Coatings provides comprehensive moisture assessment, explains repair versus replacement economics for your specific situation, and executes installations with proper moisture mitigation systems. Our team understands local soil conditions, has addressed moisture issues across Warner Center, Carlton Terrace, and surrounding neighborhoods, and stands behind our work with warranties that reflect our confidence in proper moisture management. Whether you’re dealing with isolated bubbles or widespread delamination, we’ll guide you to the solution that makes sense for your garage and your budget. Contact us at (818) 355-3804 to schedule moisture testing and receive a detailed repair proposal tailored to your floor’s specific conditions.