The Moment You Spot the Problem
You walk into your Porter Ranch showroom Tuesday morning, coffee in hand, ready to unveil your stunning new epoxy flooring services in Porter Ranch metallic copper floor—but instead of swirling three-dimensional waves, you see blotchy patches where the metallic pigments have separated from the resin, creating dull, uneven sections that look nothing like the high-end finish you invested in. The installer left two days ago, and now you’re staring at what appears to be a failed $8,000 installation. This metallic epoxy pearl separation fix Porter Ranch guide will walk you through exactly what went wrong and how to correct it before your grand opening next week.
📋 In This Guide
Step 1: Diagnose the Separation Type and Extent
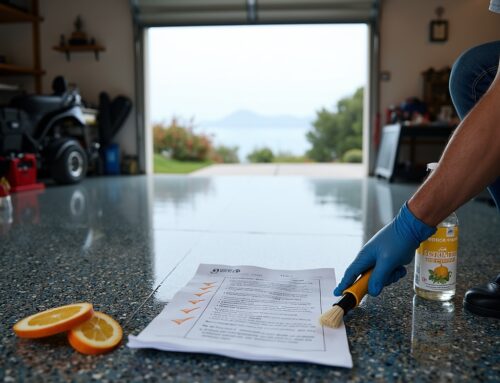
Before attempting any repair, you must accurately assess the severity and pattern of the separation. Walk the entire floor in varying light conditions—metallic epoxy reveals defects differently under natural daylight versus artificial lighting. Common issues like pigment separation often stem from improper mixing, trapped air, moisture, or exceeding pot life. Document problem areas with photos from multiple angles.
Minor separation appears as subtle color inconsistencies or slight dulling in isolated spots smaller than 12 inches across. These typically affect less than 10% of the total floor area and occur where metallic pigments have settled unevenly but the epoxy bond remains intact. Moderate separation shows as noticeable bare patches or heavy pigment accumulation in certain areas, affecting 10-30% of the floor. Complete failure presents as widespread fish-eye patterns, delamination, or entire sections where pigments refuse to disperse properly—often covering more than 30% of the surface.
Test the Bond Integrity
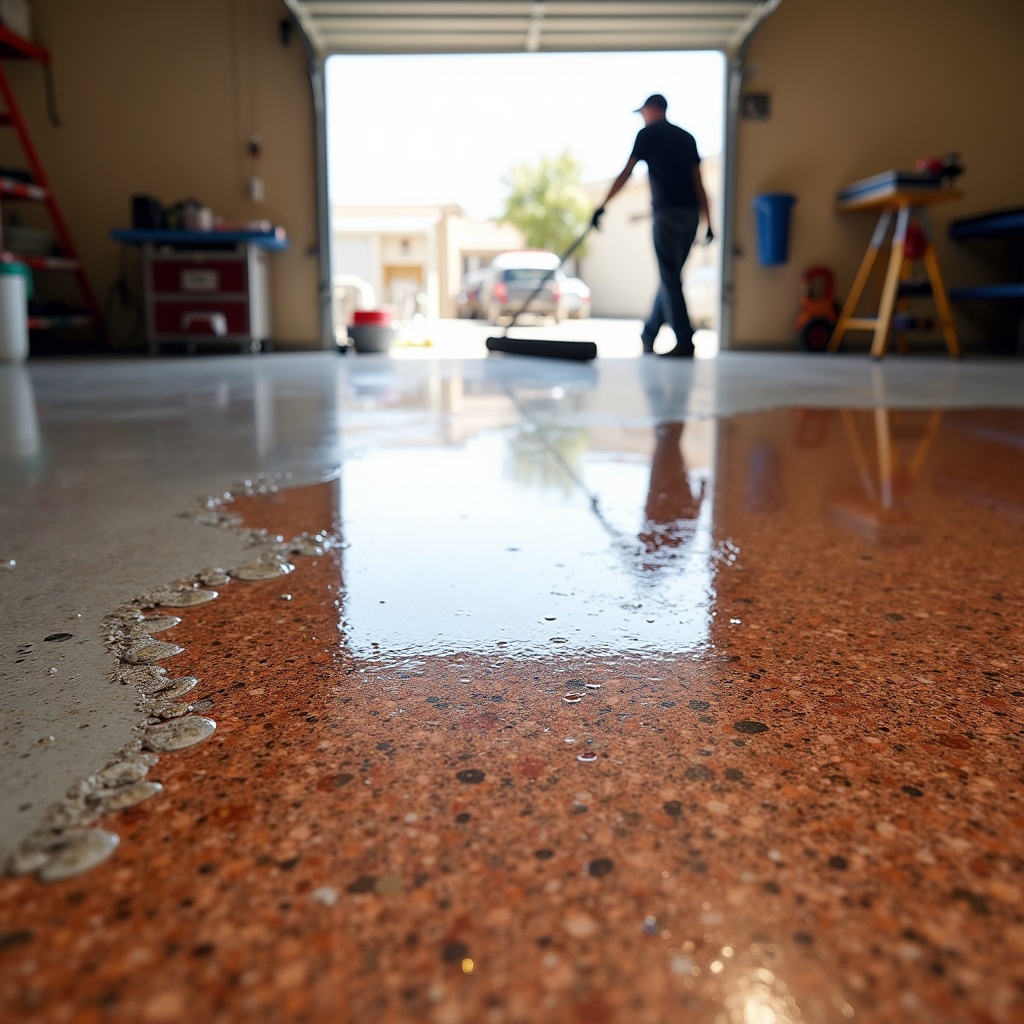
Use a coin or plastic scraper to gently test adhesion at separation edges. If the coating lifts easily or shows bubbling beneath, you’re dealing with a bond failure requiring more aggressive intervention. Peeling is a bond failure, which means the epoxy coating is separating from the concrete substrate beneath it. Check for tackiness—properly cured epoxy should be completely hard 24-72 hours after application.
Document Environmental Conditions
Record the temperature and humidity levels during the original installation. The climate in Porter Ranch is Mediterranean, characterized by hot, dry summers and mild, wet winters with most precipitation occurring between November and March. Summer installations in Porter Ranch face unique challenges—working in a garage that reaches 95°F can accelerate cure times unpredictably, while humidity fluctuations between morning coastal moisture and afternoon valley heat create conditions where metallic pigments behave erratically.
Step 2: Identify the Root Cause
Understanding why separation occurred prevents repeating the same mistake. The five primary culprits are improper mixing technique, substrate contamination, moisture interference, temperature extremes, and exceeded working time.
Improper mixing or incorrect ratios of resin and hardener can result in an unstable epoxy that doesn’t bond as it should. If the installer used high-speed mixing (anything above 400 RPM), they introduced excessive air bubbles that disrupted metallic suspension. Metallic pigments require gentle folding into the hardener first, then careful integration with the resin—never the reverse sequence.
Surface Preparation Failures
The tumbler’s surface might have been oily or unclean, causing the epoxy to fail to adhere properly. This same principle applies to concrete floors. Even microscopic oil residue, curing compound remnants, or concrete dust will prevent proper metallic dispersion. The Vineyards at Porter Ranch area homes often have polished concrete or sealed garage floors that require diamond grinding to achieve proper profile—skipping this step guarantees separation issues.
Moisture is the silent killer of metallic epoxy installations. Concrete holds moisture internally, and when vapor pressure builds up beneath a sealed coating, it pushes upward causing blistering, then bubbles, then peeling. Even in Porter Ranch’s dry summer climate, morning dew or recent irrigation can introduce enough subsurface moisture to compromise metallic flow characteristics.
Step 3: Correct Minor Separation (Affecting Less Than 10% of Floor)
For small isolated patches where the bond remains solid but pigments have separated into uneven concentrations, you can execute targeted repairs without removing the entire floor. This approach works when the epoxy has fully cured and shows no tackiness or delamination.
Sand the affected areas using 100-grit pads mounted on a palm sander, feathering edges 6-8 inches beyond visible defects. In the event that you have imperfections in your basecoat after it dries, such as outgassing air bubbles or debris, sanding the areas down with 100 grit sanding pads prior to applying the Metallic Pearl Effect epoxy is recommended. Clean thoroughly with denatured alcohol on lint-free rags—never use water, which can reintroduce moisture.
Apply Additional Metallic Layer
Mix a small batch of metallic epoxy using the same color family as your original installation. For a 4-square-foot repair area, mix approximately 8 ounces of resin with the corresponding hardener amount and metallic powder. Work in a controlled 68-75°F environment—challenging in Porter Ranch garages during summer afternoons when temperatures exceed 90°F. Wait until evening when temperatures drop into the comfortable 70s.
Apply the metallic repair coat slightly thinner than the original—approximately 10 mils versus the standard 12-15 mils. Use a foam roller with gentle “S” pattern movements to recreate the swirling effect. As you are back rolling it you can take your roller cover and create “S” shapes in the coating allowing the Metallic Pearl Effect epoxy to move around. Blend into surrounding areas while the coating remains wet, typically within 15-20 minutes of application given Porter Ranch’s warm climate.
Step 4: Address Moderate to Severe Separation (10-50% Affected)
When separation covers substantial floor areas or shows signs of delamination, partial removal becomes necessary. This intermediate approach salvages the properly bonded sections while correcting failures. Working as an Epoxy Contractor in Porter Ranch, I’ve found this method particularly effective for installations compromised by midday heat spikes or humidity fluctuations during our transitional weather periods in spring and fall.
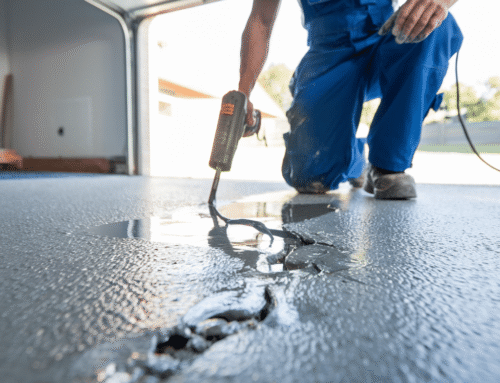
Mark all affected zones with painter’s tape, extending boundaries 12 inches beyond visible defects. Use a floor scraper or putty knife heated with a heat gun (set to 400-500°F) to soften and remove the separated epoxy. Use a plastic scraper or similar tool to gently lift off the separated epoxy without damaging the tumbler surface underneath, then clean the area with an alcohol-based cleaner to remove any residual epoxy or dust. The same principle applies to concrete—once removal is complete, diamond-grind the exposed concrete to achieve a CSP-2 profile.
Moisture Mitigation Protocol
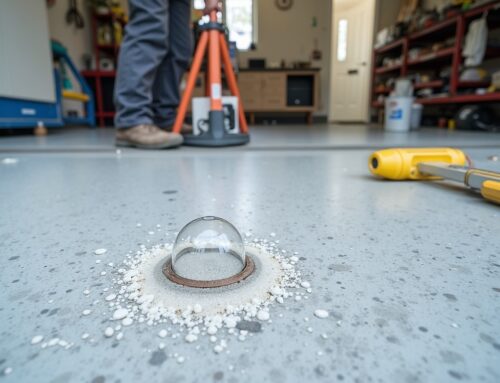
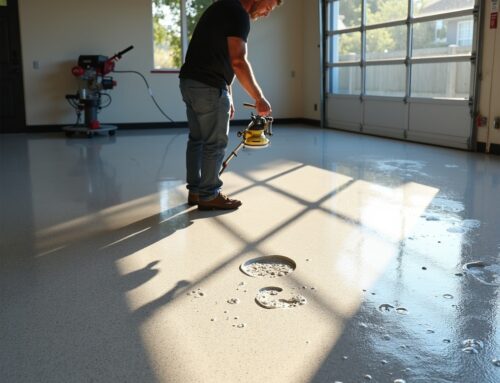
Before reapplying metallic epoxy, conduct a moisture test using the plastic sheet method: tape a 2×2-foot plastic sheet to the concrete, seal all edges, and wait 24 hours. Condensation underneath indicates moisture issues requiring a vapor barrier primer. Always conduct moisture testing before any epoxy application and use vapor-resistant primers or moisture barriers where needed. In Porter Ranch, ground-floor installations near irrigated landscaping frequently require this extra step.
Apply a moisture-mitigating primer rated for 5+ pounds of vapor transmission. Popular options include epoxy-based moisture barriers that cure in 8-12 hours. Once the primer achieves a non-tacky surface, you can proceed with the metallic layer. Mix your metallic epoxy in precise 1:1 ratios by volume—use graduated mixing containers, never eyeball measurements. Add metallic powder to Part B (hardener) first, stirring gently for 2-3 minutes before combining with Part A (resin).
| Repair Method | Affected Area | Cure Time | Success Rate |
|---|---|---|---|
| Spot Repair with Additional Metallic | Under 10% | 18-24 hours | 85-90% |
| Partial Removal & Recoat | 10-50% | 48-72 hours | 75-85% |
| Complete Removal & Reinstall | Over 50% | 5-7 days | 95-98% |
| Heat Gun Pigment Redistribution | Under 5% (minor blotching) | 6-8 hours | 60-70% |
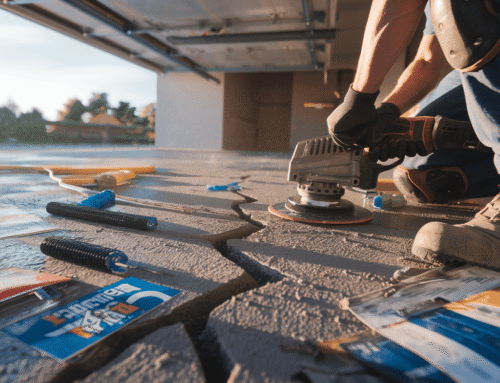
Step 5: Execute Complete Removal for Widespread Failure
When separation exceeds 50% of the floor area or shows systemic bond failure, complete removal offers the only reliable long-term solution. In cases of minor, localised peeling targeted repairs can work, but only if the underlying cause has been identified and resolved—patching a floor without fixing the root problem just delays the next failure. Attempting to patch over widespread separation wastes time and materials.
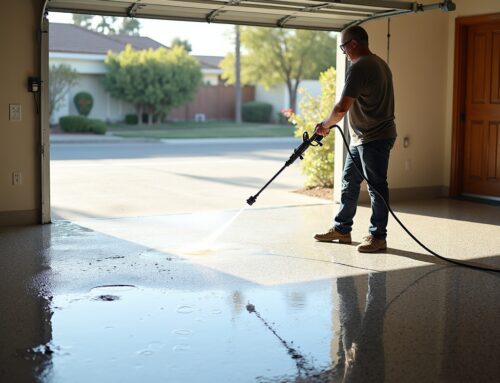
Rent a walk-behind floor scraper or grinder equipped with diamond tooling. For a typical 400-square-foot garage, budget 6-8 hours for complete metallic epoxy removal. Work in overlapping passes, maintaining consistent downward pressure. The epoxy will come off in sheets or chips depending on cure hardness—Porter Ranch’s high summer temperatures often create exceptionally hard cures that require aggressive grinding.
Once removal is complete, assess the concrete substrate. Should You Repair Concrete Cracks Before Epoxy? What Porter Ranch Homeowners Need to Know addresses this critical pre-installation step. Fill any cracks, spalls, or damage with epoxy-based concrete repair compound, allowing 24-48 hours cure time. Grind the entire surface to CSP-2 or CSP-3 profile using 16-30 grit diamonds. Vacuum thoroughly with a HEPA-filtered shop vacuum, then wipe with tack cloths.
Reinstallation Best Practices
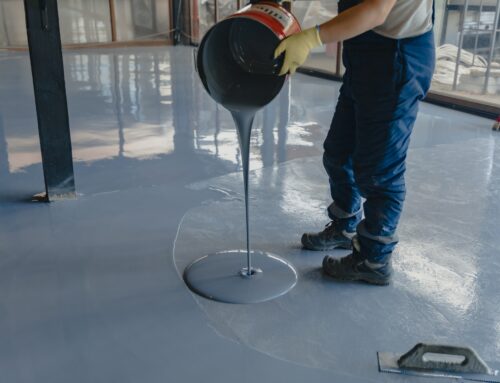
Schedule the new installation during optimal weather windows—in Porter Ranch, early mornings in spring or fall provide the most stable 65-75°F temperatures with moderate humidity. Avoid summer afternoons when Porter Ranch’s unique heat patterns change garage floor epoxy prep requirements significantly. Apply a base coat of solid-color epoxy first, which serves multiple purposes. It is strongly suggested that a basecoat primer be applied first, as it serves multiple purposes including moisture blocking and enhanced metallic visual depth.
Allow the basecoat to cure for 12-16 hours before applying the metallic layer. Mix metallic epoxy in small batches—no more than 1.5 gallons at a time—to ensure you stay within the 20-30 minute working window. Work quickly but deliberately, as the pot life of the metallic epoxy is limited, usually 20-40 minutes depending on temperature and product. In Porter Ranch’s warmer climate, expect pot life at the shorter end of that range.
Step 6: Apply Professional-Grade Topcoat Protection
Never leave metallic epoxy unprotected, regardless of whether you’ve executed a spot repair or complete reinstallation. The topcoat serves as both UV protection and wear layer, essential for maintaining the dimensional appearance of metallic finishes. Wait until the metallic layer reaches a dry-to-touch state, typically 18-24 hours in Porter Ranch’s climate.
Select either polyaspartic or high-performance urethane topcoat. Polyaspartic offers faster cure times (4-6 hours) and superior UV resistance—critical for epoxy flooring in Northridge and Porter Ranch areas where large garage door openings expose floors to direct sunlight. Urethane topcoats provide slightly better chemical resistance and work time but require 24-48 hours before accepting foot traffic.
Apply topcoat in thin, even layers using a 3/16-inch nap roller. Avoid over-rolling, which introduces air bubbles that mar the glass-like finish. For areas larger than 500 square feet, use a backpack roller system to maintain wet edges and prevent lap marks. Most metallic installations benefit from two topcoat applications spaced 4-8 hours apart, building a total protective film thickness of 4-6 mils.
Prevention Strategies for Future Porter Ranch Installations
Learning from separation failures protects future investments. Temperature management ranks as the single most critical prevention factor in Porter Ranch’s variable climate. Install remote temperature and humidity monitors in your garage or workspace, checking readings before mixing any epoxy. Ideal application conditions fall between 65-85°F with relative humidity below 60%. When working during Porter Ranch’s summer months where humidity levels near 72% are common, run dehumidifiers for 24 hours before installation.
Concrete preparation cannot be overstated. Every professional installation should include mechanical diamond grinding to remove all laitance, sealers, and contaminants. The surface should feel like 80-grit sandpaper when complete. Perform moisture testing on all ground-level installations, particularly in areas near the Santa Susana Mountains foothills where groundwater tables run higher. Properties in neighborhoods like The Vineyards require extra attention to moisture mitigation given their proximity to landscaped common areas with regular irrigation schedules.
Material Selection and Mixing Protocols
Invest in professional-grade metallic epoxy systems from reputable manufacturers—not big-box retail kits. High-quality systems include precisely calibrated metallic pigments that suspend evenly and maintain stability through temperature fluctuations. Follow mixing instructions exactly: add metallic powder to Part B hardener, stir gently for 2-3 minutes using a spiral mixer at 300-400 RPM maximum, then combine with Part A resin. Mix only until fully blended—overmixing (beyond 3 minutes total) generates excessive heat and shortens working time.
Budget adequate material quantities with 10% overage for proper coverage. Attempting to stretch insufficient material creates thin spots where metallic pigments separate. For reference, quality metallic systems cover 80-120 square feet per gallon depending on desired effect intensity. Calculate square footage accurately, accounting for floor irregularities and perimeter waste.
Cost Analysis: Repair Versus Complete Replacement
💰 Metallic Epoxy Separation Repair Costs
- Minor Spot Repair (under 50 sq ft): $400–$800
- Moderate Partial Removal (100-200 sq ft): $1,200–$2,400
- Complete Removal & Reinstall (400 sq ft garage): $3,500–$6,500
- Professional Inspection & Assessment: $150–$300
- Moisture Testing & Mitigation: $400–$900
Understanding the financial implications helps you make informed repair decisions. Minor separation repairs affecting less than 10% of floor area typically cost $400-$800 including materials, labor, and topcoat. This assumes the existing floor bond remains solid and only requires aesthetic correction. Material costs include approximately $80-$120 for metallic epoxy (small batch), $40-$60 for topcoat, and $30-$50 for sanding supplies and cleaning materials. Professional labor adds $250-$570 for 3-5 hours of skilled work at typical Porter Ranch rates of $75-$95 per hour.
Moderate repairs requiring partial removal of 100-200 square feet run $1,200-$2,400. This budget covers grinding equipment rental ($80-$120 per day), disposal fees ($50-$100), moisture barrier primer ($120-$180), metallic epoxy material ($240-$360), topcoat ($160-$240), and professional labor ($600-$1,400 for 8-14 hours). For DIY-capable homeowners, eliminating professional labor reduces costs by approximately 40-50%, though results depend heavily on experience level.
Complete removal and reinstallation of a standard 400-square-foot garage ranges from $3,500-$6,500, depending on concrete condition and metallic system quality. This represents 60-80% of the cost of the original installation—a significant expense but substantially less than starting from scratch. Five Star Epoxy & Coatings recommends obtaining detailed written estimates that itemize removal, surface preparation, moisture mitigation, materials, and labor separately for transparency.
Compare repair costs against your floor’s expected remaining lifespan. A well-installed epoxy floor holds up for 7–15 years or more with proper maintenance. If your floor is less than two years old and separation resulted from installation errors rather than structural concrete issues, investing in proper repair typically delivers better ROI than living with the defects. However, floors showing separation combined with other failures (cracking, widespread delamination, or substrate damage) often warrant complete replacement to avoid recurring problems.
When to Call Professional Help
While motivated DIYers can tackle minor spot repairs, certain situations demand professional expertise. If separation coincides with Porter Ranch epoxy floor bubble repair issues, you’re dealing with systemic moisture or application problems requiring professional diagnosis. Similarly, if you detect soft or tacky areas days after installation, the resin-to-hardener ratio was likely incorrect—a chemical problem that won’t resolve with surface interventions.
Widespread separation affecting more than 30% of floor area benefits from professional removal and reinstallation. Experienced installers bring commercial-grade grinding equipment that removes failed coatings efficiently while preserving concrete substrate integrity. They also carry moisture meters, infrared thermometers, and other diagnostic tools that identify hidden problems invisible to casual inspection.
For Porter Ranch homeowners and business owners facing metallic epoxy separation issues, Five Star Epoxy & Coatings provides expert assessment and correction services. Our team understands the unique challenges presented by San Fernando Valley’s climate variations and can recommend solutions tailored to your specific situation. Whether you need minor touch-ups or complete floor rehabilitation, professional guidance ensures your investment delivers the stunning metallic finish you originally envisioned. Contact our team at (818) 355-3804 to schedule an on-site evaluation and receive a detailed repair proposal.
Similar challenges affect installations throughout the region—epoxy flooring in Granada Hills faces identical temperature and humidity variables that can compromise metallic systems when not properly managed. The key lies in recognizing problems early, accurately diagnosing root causes, and implementing targeted corrections that address underlying issues rather than merely covering symptoms.